With the end of the Leeroy Jenkins limited time event in Mercenaries, the Mi'da, Pure Void bounty in the Onyxia's Lair zone is finally available to everyone, and it's quite a relevant one: beating it in Heroic mode with Leeroy Jenkins in your party will unlock this Merc's third equipment, Ninja-Looting 1.
Moreover, completing this bounty will also reward you with 3 Mercenaries packs, courtesy of Valeera Sanguinar's taskline.
If, for whatever reason, you're looking for some solid strategies to complete the Mi'da, Pure Void bounty, look no further, as in this in-depth guide we're going to uncover every stone and describe step by step what you should do in order to achieve your goal, as well as provide you several comps you can use to do so. Enjoy!
Table of Contents
How To Complete The "Mi'da, Pure Void" Bounty
- Location: Onyxia's Lair, Bounty 6
- Mode: Heroic (not necessary for Valeera's task, but essential for Leeroy's Ninja-Looting 1)
- Rewards: 3 Mercenaries packs (one time), Leeroy Jenkins's Ninja-Looting 1.

Mi'da, Pure Void will appear on the battlefield as a Neutral 10/400, supported by two 20/60 Void Shades, resulting in a mostly Fighter encounter for your Mercenaries. Each of these three units has an aura ability.
- Mi'da, Pure Void - Can't be damaged. Whenever a character is about to be healed, this loses Health instead.
- Void Shade - Shadow Damage +1.
On your side of the board, you'll find a 0/150 Shard of Purification, with a moveset consisting of 3 Healing-related abilities and with a rather useful passive effect, but we'll get to it a bit later. For now, let's focus on the enemies.
Mi'da, Pure Void
Mi'da represents quite the peculiar boss, as you won't be able to take it down in the usual way, namely through either physical or special damage. In fact, Mi'da, Pure Void sets an unprecedented requirement: if you want to complete its bounty, you'll have to heal it to death.
Mi'da will absorb any form of healing across the board, doesn't matter where it comes from and where it's directed, turning it into self-damage. Based on the circumstances, this mechanism can become both an upside and a downside to your fight:
- Upside - You can turn mass healing effects like Cornelius Roame's Hold the Front 1 into damage burst.
- Downside - Your Mercenaries will be less resilient, as you won't have many ways to ensure they'll stay healthy throughout the fight.


Mi'da, Pure Void's moveset.
As for Mi'da's moveset, it's basically a Vol'jin with a couple more tricks up its sleeve.
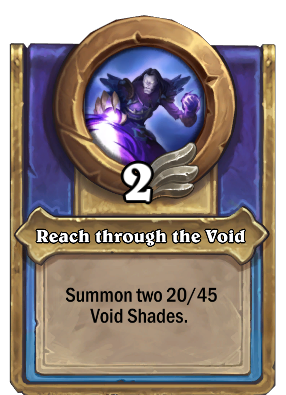
- Reach through the Void is quick and generates a ton of stats (40/90) each time, but the generated Shades are relatively easy to deal with.
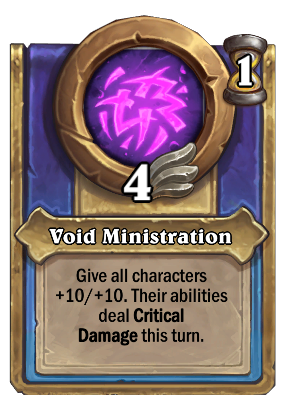
- Void Ministration can benefit you, depending on the circumstances, but make sure that Mi'da will be the only enemy unit on the board when this ability will be used.
Even though none of the enemy units' text states so, once you'll be able to take down Mi'da, Pure Void, any Void Shade on the board will perish with it - kind of neat, although we would've liked to know it from the very start!
Void Shades
Continuing with Mi'da's spawns, they're nothing you haven't seen before: rather slow Fighters with lots of attack but a simple physical ability in Attack. Their most annoying aspect is the Shadow Damage +1, which can make some of Mi'da's abilities a bit more painful to deal with.

Void Shade's moveset.
The fight will start with two 20/60 Void Shades on the board, and each Reach through the Void cast will summon two other, but with 20/45 as statline.
Shard of Purification
Shard of Purification is extremely good in this fight, as it provides the healing that is necessary to take down Mi'da, Pure Void. Moreover, all the healing delivered to Mi'da by this unit will be doubled, meaning that healing Mi'da for 20 will result in 40 damage!

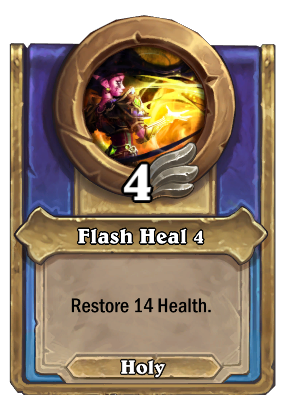
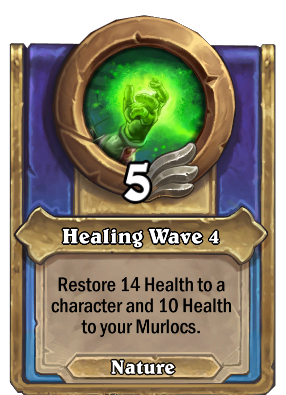
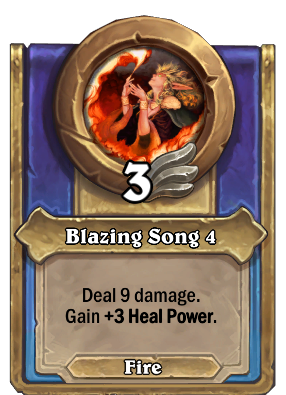
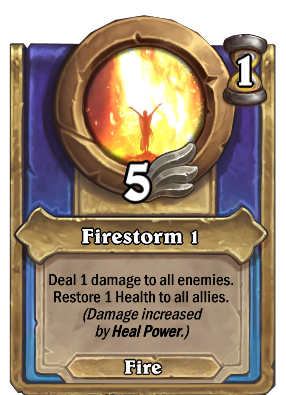
Shard of Purification's moveset.
Here's a quick breakdown of Shard's moveset:
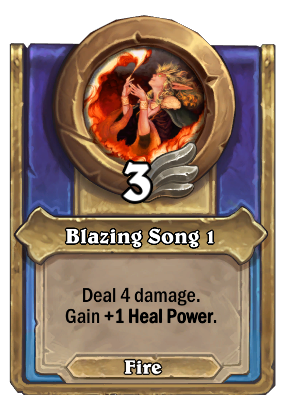
- Blazing Song 4 - While you may not mind the damage side of this ability (both to clear Void Shades and for potential Fire synergies), the most relevant part here is the Heal Power, which will power up Shard of Purification's other two abilities.
- Flash Heal 4 - If directed towards Mi'da, the main source of damage you'll use to complete the bounty.
- Healing Wave 4 - Mi'da's abilities are at worst speed 5, meaning that you're not very likely to get the Healing Wave 4 effect. Therefore Flash Heal 4 is the superior ability.
Fight Approach
Now that we've cleared up what each unit does, it's time to explain how to take down your enemies.
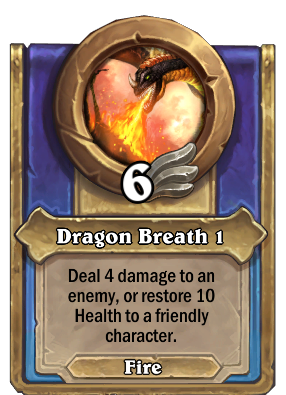
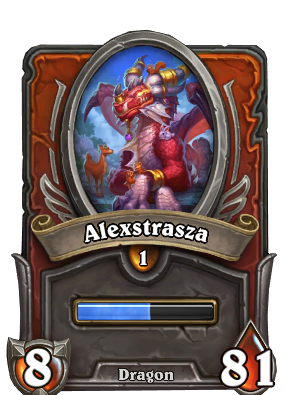
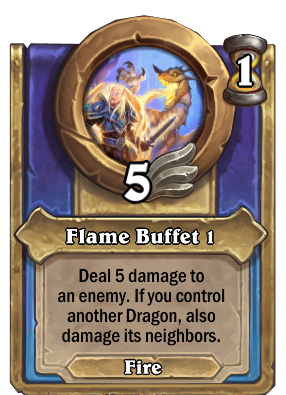
First off, you need either Area of Effect or Protector damage to deal with the Shades: Alexstrasza is a good example, as she provides both area damage with Flame Buffet 1 and healing with Dragon Breath 1.
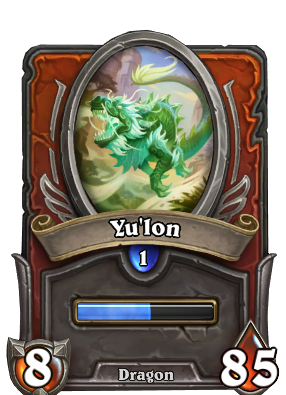
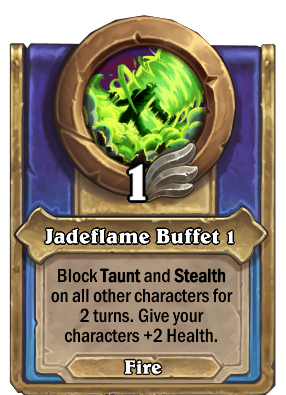
Secondly, health buffs that do not involve healing bypass Mi'da, Pure Void's aura effect: just to name one, Yu'lon's Jadeflame Buffet 1 gives your units a decent form of sustainability.
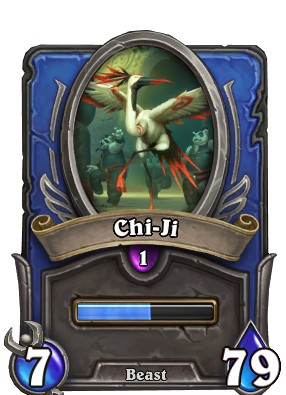
Finally, Chi-Ji. Blazing Song 1 ramps up healing effects tremendously, allowing you to reduce Mi'da to dust in less time.

Suggested Comps
Here are a few Mercenaries parties you can use to complete the Mi'da, Pure Void Bounty. You'll be able to choose between a few options, as suggested by different content creators.
Out of Cards Recommendation - Dragon Comp
We found ourselves at ease with the comp you see below. Dragons are guaranteed to give you an easy climb, and you can count on a rather versatile formation for the final fight.
Here are a few tips:
- Climbing trio is Yu'lon-Sinestra-Long'xin, but it may vary depending on what you're up against.
- Final fight trio is Alexstrasza-Yu'lon-Chi-Ji.
- Use Yu'lon's Jadeflame Buffet 1 as much as possible to compensate the lack of healing.
- If there are too many Shades on the board, consider using Jade Gust 1 instead.
- For Alexstrasza, alternate Dragon Breath 1 and Flame Buffet 1 based on the state of the enemy board.
- Use Chi-Ji's Blazing Song 1 to ramp up healing effects.
ZombiesGoNomNom's Holy Comp
Another clever way to approach this fight is with a heavy-healing build, like the one ZombiesGoNomNom came up with. Anduin Wrynn, Prophet Velen and Cornelius Roame will quickly reduce Mi'da, Pure Void's health total to 0, while also taking card of the Shades thanks to Holy Nova 1 and so on.
- Final fight trio is Anduin Wrynn-Cornelius Roame-Prophet Velen.
- Valeera Sanguinar has access to a Treasure called [Hearthstone Card (Assassinate 1) Not Found], which will kill a Neutral enemy unit, and guess what: Mi'da, Pure Void is Neutral!
- You have a chance for the fight to be over before it even begins.
Old Guardian's Nature Comp
Finally, here's Old Guardian's Nature comp.
- Final fight trio is Malfurion Stormrage-Bru'kan-Guff Runetotem.
- Malfurion Stormrage's Liferoot Staff 1 will provide waves of healing (which will be increased by Shard of Purification's Blazing Song 4).
- Bru'kan and Guff Runetotem will provide damage, allowing you to get rid of all the Shades in no time.
- Cookie, the Cook's Appetizers 1 represents a form of health buff that isn't negated by Mi'da, Pure Void's aura effect.
Other Resources
Our clever community members set up a forum thread to share your Mercenaries progression journey, and we have added a #mercenaries channel on our Discord server if you want to talk with others in real-time. If you need an assist, you can also respond to this guide and we'll do our best to help you out; the comments are also a great way to share your own parties that you've used to complete the challenge above.
Good luck taking out this Bounty for those sweet sweet coins, the equipment unlock, and progression rewards!

Comments
Great article! I beat this one on normal easily, but haven't attempted Heroic yet.
Just a reminder for you Merc-heads trying to maximize your PvE experience: REROLL the map if you don't have a clear path. If you're going on Heroic, you want to avoid elite encounters at all costs. No matter how strong your comp is, elite encounters almost always cost you a merc or two, and you might not be able to afford that.
Happy hunting everyone!
Cariel owns this fight, especially since they buffed the healing on her deathblow. As a protector she has the right color to deal with the adds. Find treasures that buff her stats and go about one-shotting the adds, taking huge chunks out of the boss with every go.
The best comp is just to have Cariel. She nukes it with equipment one turn one. 60 healing per member on your side. together with a mercanery with ysummons a minion you deal 360 damage after killing a minion with cariel.
There is new treasure which kills random neutral minion on the start of the battle. Does it work on neutral bosses? It would be funny to one shot it.
It’s [Hearthstone Card (Assassinate 1) Not Found] - we mentioned it in the Holy Comp section becauseValeera Sanguinar can find it.
Oh, thanks, didn't see it.
Kazakus also has this treasure.
The rank 2 version of this treasure, which you can get trough elite encounters or upgrade, kills a random minion period. I had Valeera kill Lokholar once. Needless to say it is one of the strongest treasures.
This.
Nice article. Just an addition. The holy comp also has the chance to get Valanyr which can one shot Mi'da, too.
Yup, you’re right: nice catch